|
|
DSC Tech Library
PACER Configuration System
ACD and Predictive Configurations
How to handle the distribution of inbound and pridictive calls
The DSC Pacer PdialerPlus Automatic Call Distributor (ACD) is used to distribute both inbound calls and outbound predictive calls to the appropriate station. This routing is done based on a configuration item referred to in the dialer as a DNIS. This comes from Dialed Number Information Service, a number that can be passed in with inbound phone calls from the telephone company. In the Dialer, this is used as a somewhat generic term to indicate any call routing grouping. In the case of an inbound call, this DNIS does directly relate to the DNIS information provided by the telephone company. For outbound predictive calls, on the other hand, the DNIS relates to the “ACD vector for TMR assignment” in the Telemation campaign settings.
In addition to DNIS items, the ACD also consists of “groups”. These groups are what are used to determine what users are available for calls from which DNIS. Each group may be assigned one or more DNIS items for which it’s participants may accept calls.
More than one group may handle calls from a particular DNIS, controlled by a priority given to each DNIS in the group. A call on a particular DNIS will be routed to the longest available station on the group with the lowest numbered priority for that DNIS. In other words, groups are searched in priority order for an available station, then the longest available station will be selected.
For a station to be available within a particular group, the user must be logged into that group. This is currently accomplished by preceding the extension number with “groupname-“ on the Telemation security screen, for example “Group1-101” would log the user into station 101 and make them available for calls routed to Group1.
Configuration steps
There are three steps to configuring the ACD:
- Create DNIS entries
- Create Group entries
- Associate DNIS entries with Group entries
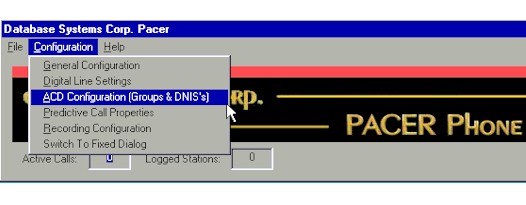
Selecting ACD Configuration (Groups & DNIS's) from the Pacer "Configuration" menu will invoke a new dialog box that will allow you to define the Groups and DNIS's needed.
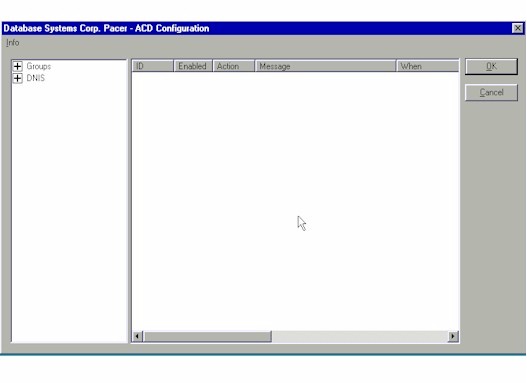
The ACD configuration dialog consists of a Tree-view, a details panel, and OK and Cancel buttons. The tree-view lists configured Groups and DNIS items, while the details panel will show information relevant to the selected Group or DNIS. the Groups and DNIS items may be expanded or compressed by double clicking on each item.
Creating a Group entry
To create a Group item, right click on the “Groups” item in the tree-view and select Add New Group from the pop-up menu. This will bring up a New Group dialog which simply accepts the name of the new group. To delete a group, right click on the group item in the tree view and select Delete Group.
Creating a DNIS entry
Each DNIS item has a default action and default message, as well as time-specific actions and messages. The messages are .wav files to be played if there is no station available to take a call, or the word “none” for silence, and the action is what should be done with a call after the message is played – put the call on hold for the next available agent, or simply drop the call.
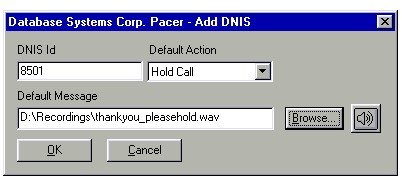
To add a new DNIS item, right click on the DNIS item in the tree-view to bring up a pop-up window and select Add New DNIS. This will activate the Add DNIS dialog.
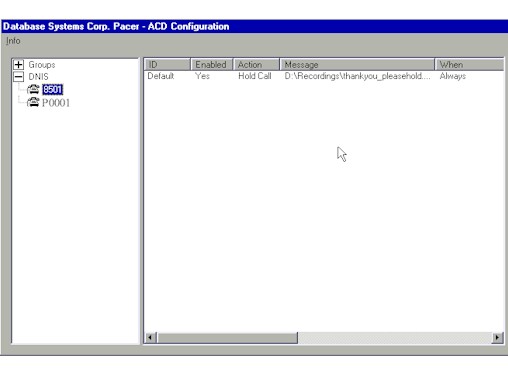
To define a DNIS that is for a predictive campaign, a 5 character id starting with 'P' and ending in a 4 digit sequential number is used to define a separate predictive campaign (I.E. P0001). This predictive DNIS is also specified in the predictive campaigns ACD vector for TMR assignment, found in Telemations campaign parameters, Outbound call setup.
Enter a DNIS id, select an action (Hold call or Drop call), and enter the full path to a .wav file, the word “none”, or press Browse to select a .wav file for the message. After filling in all three fields press the OK button to add the new DNIS item. If you discover a mistake before pressing OK, you can press Cancel to cancel the entry.
After defining a DNIS it is possible to define additional, time-controled messages and actions. The initial Action will be called "Default" and cannot be deleted. To add additional new actions right click on the particular DNIS item in the tree view and select Add Action. This will bring up the Action dialog.
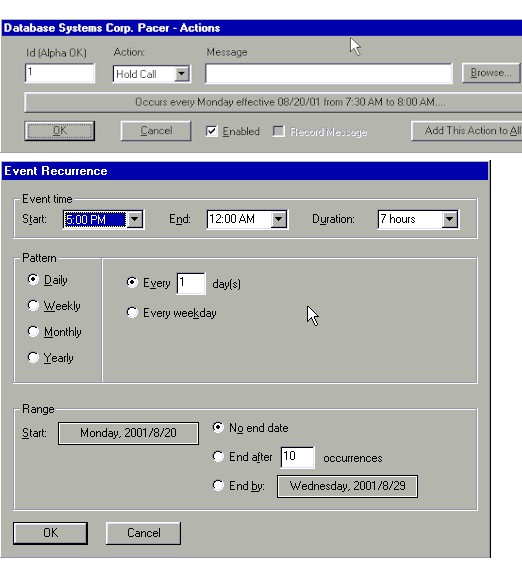
Here you select a start and stop time for this action, enter a message to be played, and select an action.. There cannot be over-lapping actions. For an action which must continue through midnight into the next day, you need to make two entries – one from the start time to midnight, and one from 12:01 am to the stop time.
Right clicking on a specific action will give you the choices of modifying the action or deleting it. Chosing to modify will bring up the Action dialog again and allow the specifications for the action to be modified. Selecting Delete will remove the item. Note that you cannot remove the Default action.
Associating a DNIS with a Group entry
The final step is to associate a DNIS item with a Group or Groups. To associate a DNIS with a particular group, simply “drag-n-drop” the DNIS item in the tree view into the desired group in the tree view. This is done by pressing down on the left mouse button while pointing to the DNIS item you wish to associate, moving the mouse over the Group you wish to associate with, then releasing the mouse button.
This will bring up a “GROUP priority for DNIS” dialog. Here you enter the priority, from one to ten, you wish this group to have for this DNIS item. One is the highest priority and 10 is the lowest.

To alter the priority of a group for a DNIS item, or to remove a DNIS item from a group, select the group and right click on the DNIS entry in the details pane of the configuration dialog. This will bring up a pop-up menu with choices to “Remove from group” or “Change Priority”.
|

